WunderGraph
Overview
WunderGraph is an open source API developer platform with a focus on developer experience. At its core, WunderGraph combines the API gateway pattern with the Backend for Frontend (BFF) pattern to create the perfect developer experience for working with APIs.
WunderGraph can combine all of your services, databases such as Fauna, file storage, identity providers (IdPs), and third-party APIs into your own developer toolkit without experiencing vendor lock-in.
WunderGraph makes it possible for your application to use its own dedicated BFF while allowing code sharing across all your applications, while preventing credentials and API keys from leaking into the browser.
With the help of WunderGraph, you can structure your Public API as operations. Every operation is a GraphQL file with a single GraphQL query or mutation that the BFF exposes using JSON-RPC (HTTP). This approach hides unnecessary complexity from designing a cacheable and secure public API with GraphQL.
This guide demonstrates how to integrate Fauna as a data source into a WunderGraph application. The procedure uses the WunderGraph open source "monorepo," which has a dedicated example for Fauna as a data source.
Step 1: Create a database that has sample data
-
Log in to the Fauna Dashboard.
-
Click the CREATE DATABASE button.
-
Enter a name for your database. For example:
wundergraph -
Select an appropriate Region Group
-
Check the Use demo data checkbox.
-
Click the CREATE button.
When you complete these steps, you have a database that has several collections of documents, several indexes, and a configured GraphQL API with a matching schema definition. The sample data allows you to experiment with various CRUD queries and mutations.
Step 2: Create a key with the admin role
-
Click the Security button in the left navigation pane.
-
Click the NEW KEY button.
-
Click the SAVE button.
-
Store the displayed secret in a safe place. The Dashboard only shows a secret once.
When you complete these steps, you have a Fauna secret that grants access to use the associated database.
Step 3: Clone the WunderGraph monorepo
-
Open a terminal window.
-
Run the following command:
terminalCopied!
Step 4: Configure the WunderGraph integration
-
In the terminal window, run the following commands:
terminalCopied!cd wundergraph/examples/faunadb-nextjs cp example.env .env -
Edit the file
.envto replace<replace-with-your-token>with the secret for theadminkey that you stored as part of Step 2: Create a key with theadminrole. -
If you selected a Region Group other than Classic, edit the file
.envto replacehttps://graphql.fauna.com/graphqlwith the GraphQL API endpoint suitable for your selected Region Group:-
EU:
https://graphql.eu.fauna.com/graphql -
US:
https://graphql.us.fauna.com/graphql -
Preview:
https://graphql.fauna-preview.com/graphql
-
Step 5: Install dependencies and start the application
-
In your terminal window, run the command:
terminalCopied!npm install && npm start
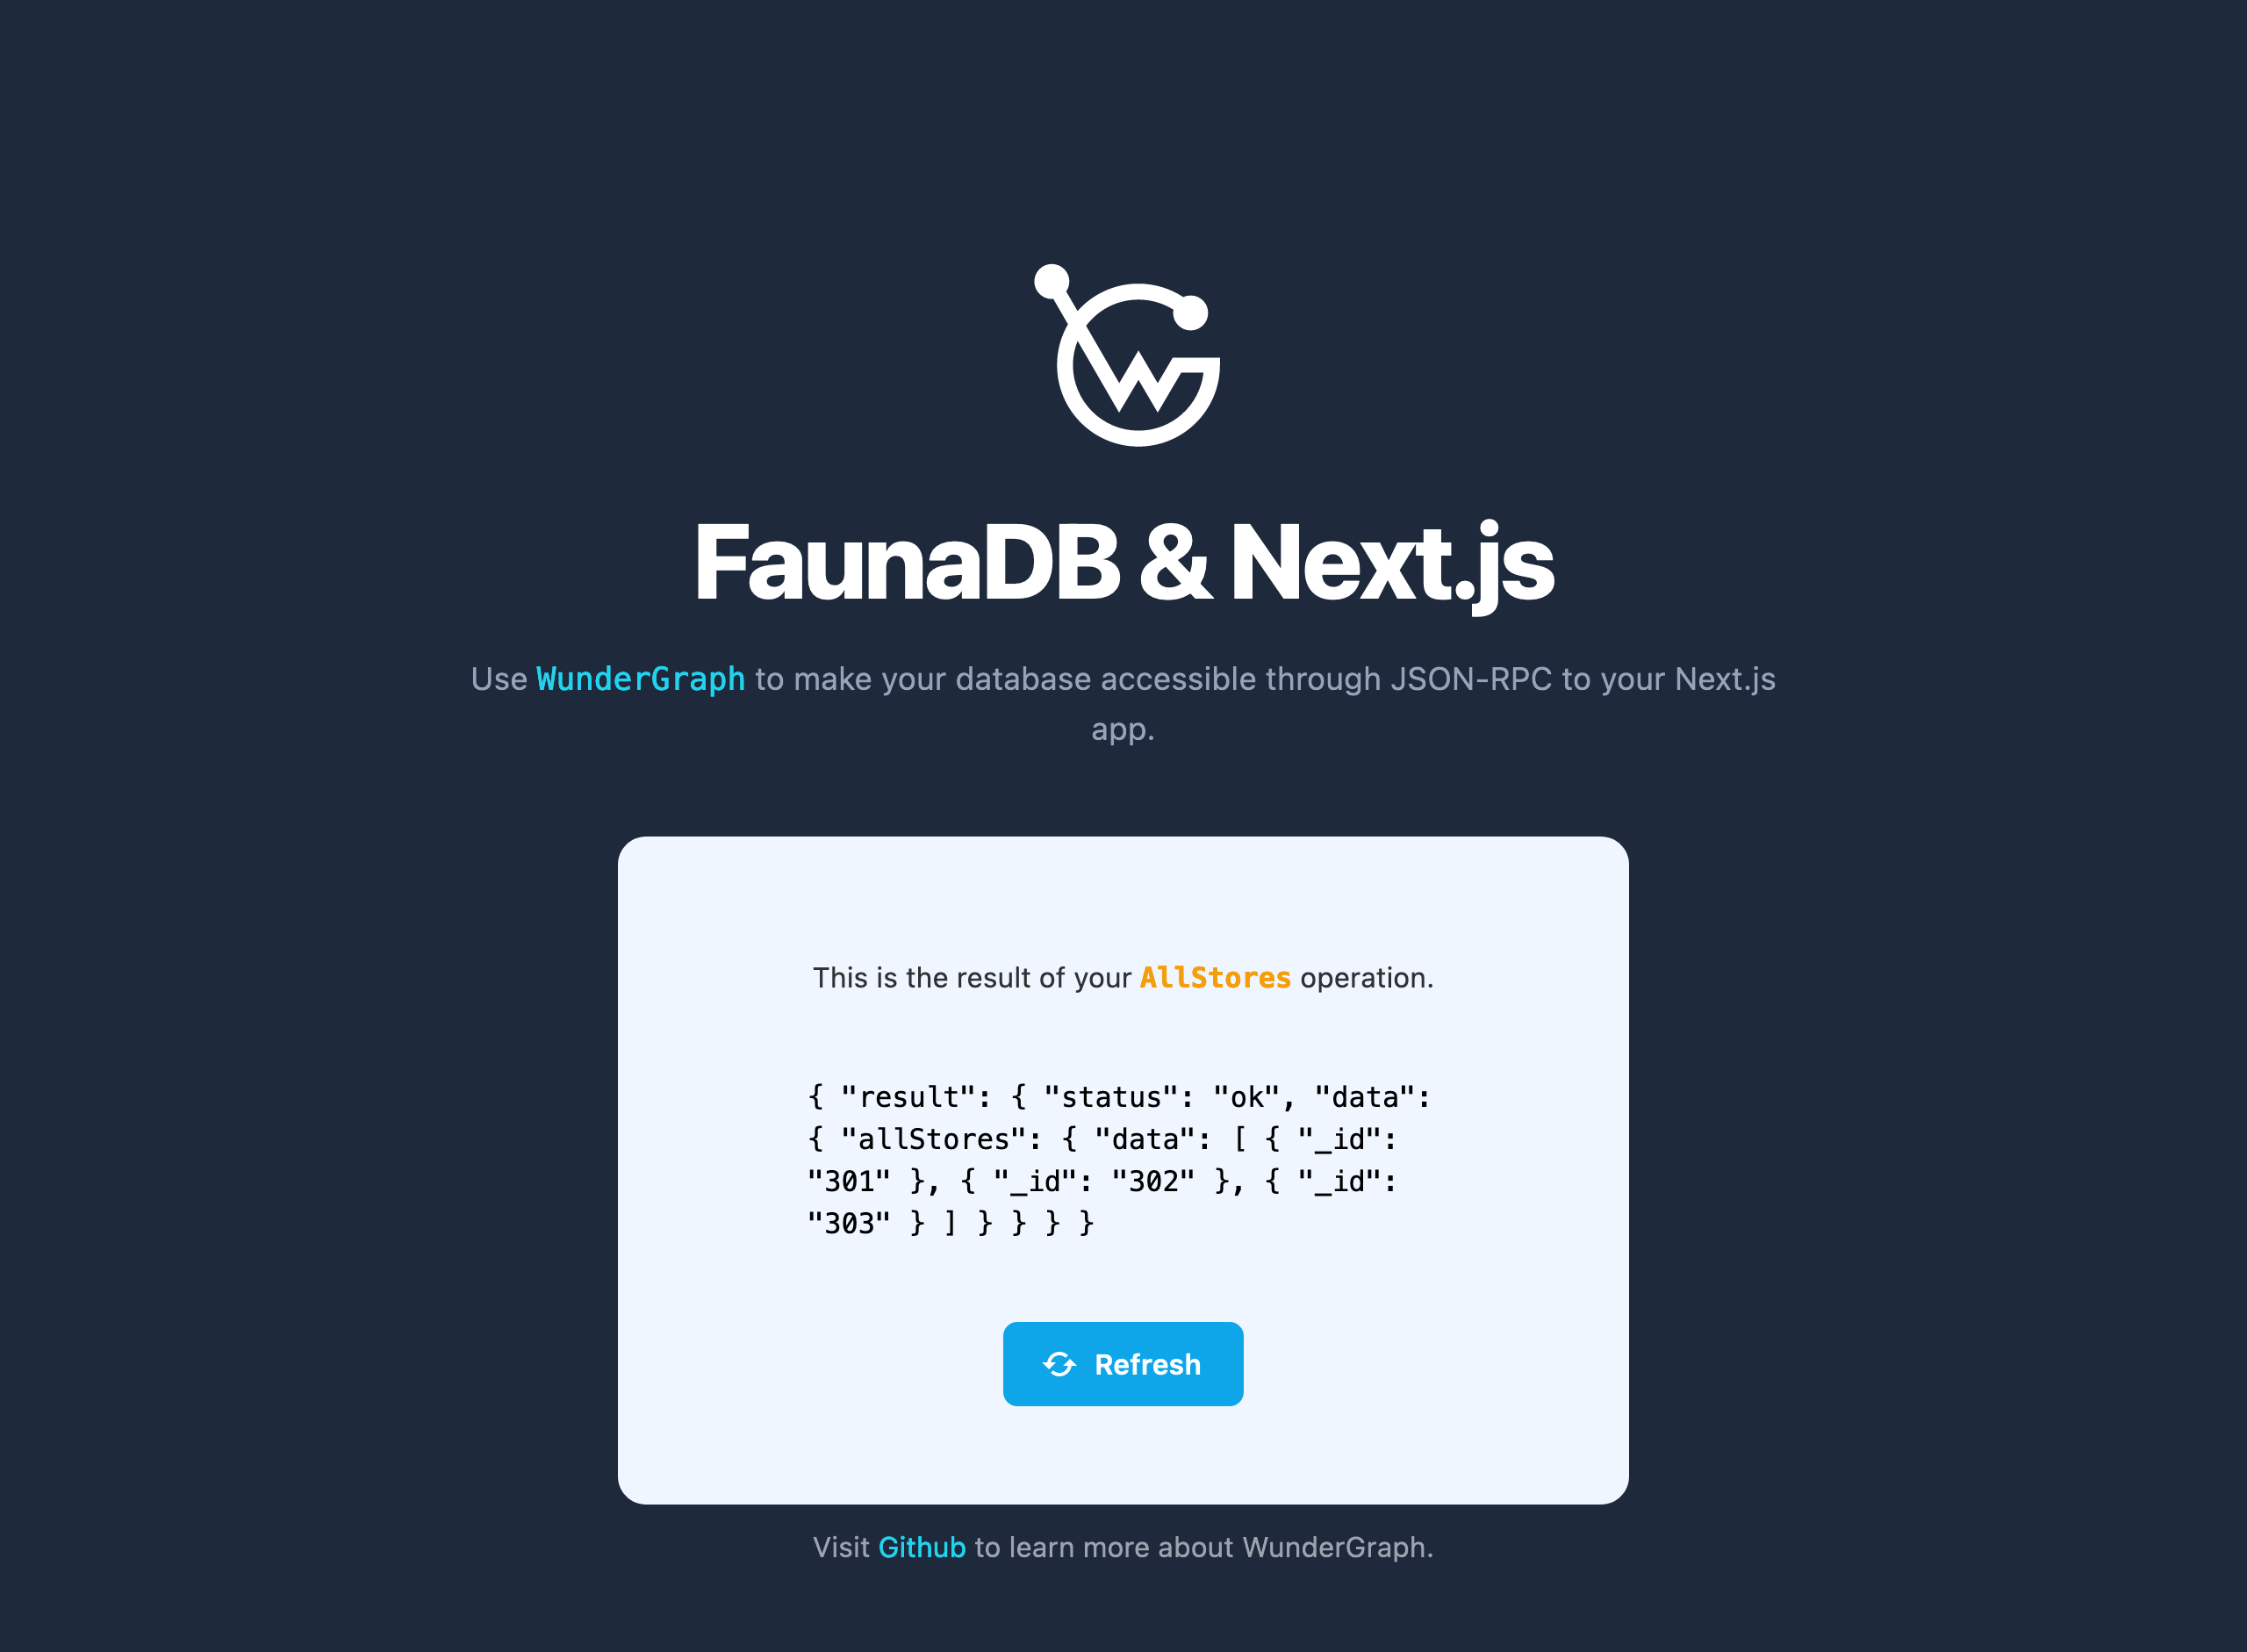
When you run the command, you should see the dependency installation
progress followed by the start of the application. Your web browser
should open http://localhost:3000 and display the result of the
AllStores operation:
Step 6: Add a store
-
In the Dashboard, click the Shell button in the left navigation pane.
-
In the lower pane, replace existing query text with:
shellCopied!Create( Ref(Collection("stores"), "304"), { data: { name: "My Personal Bodega", address: { street: "1234 My Street", city: "My City", state: "WA", zipCode: "90210" } } } ) -
Click the RUN QUERY button.
-
In the WunderGraph application, click the Refresh button. You should see that the list of stores now has the new
_idfield304. -
Type Control+C to exit the WunderGraph application.
Now that the WunderGraph application is configured, look at the
generated integration code in .wundergraph/wundergraph.config.ts. You
should see that adding Fauna as a data source is only eight lines of
code. You can also review the file in the .wundergraph/operations
folder to see the AllStores query.
Summary
The demonstration application is simple: only one operation is defined. But it shows how easy it is to safely expose Fauna to your front-end application using WunderGraph. You can extend the demonstration application, or start your own using similar configuration steps. Learn more in the WunderGraph documentation.
Is this article helpful?
Tell Fauna how the article can be improved:
Visit Fauna's forums
or email docs@fauna.com
Thank you for your feedback!